Saraste Shirt Dress
目录
Over the last couple of months, I picked up sewing as a hobby. Now I’m excited to share about this Saraste Shirt Dress I made! The sewing pattern comes from the book Breaking The Pattern, by Named Clothing.
(A quick note to 中文 readers: if you’ve been following some of the other posts in this blog – mostly parenting in the US written in Chinese 中文 – rest assured that this blog is not hacked/pwned. It’s just Miki decides to share sewing related stuff here 😄.)
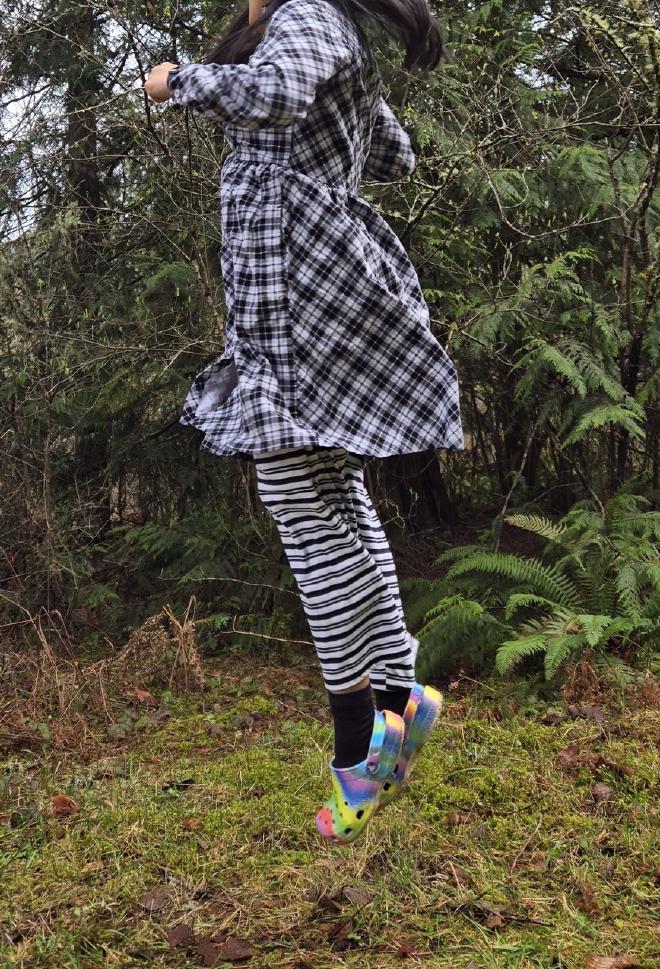
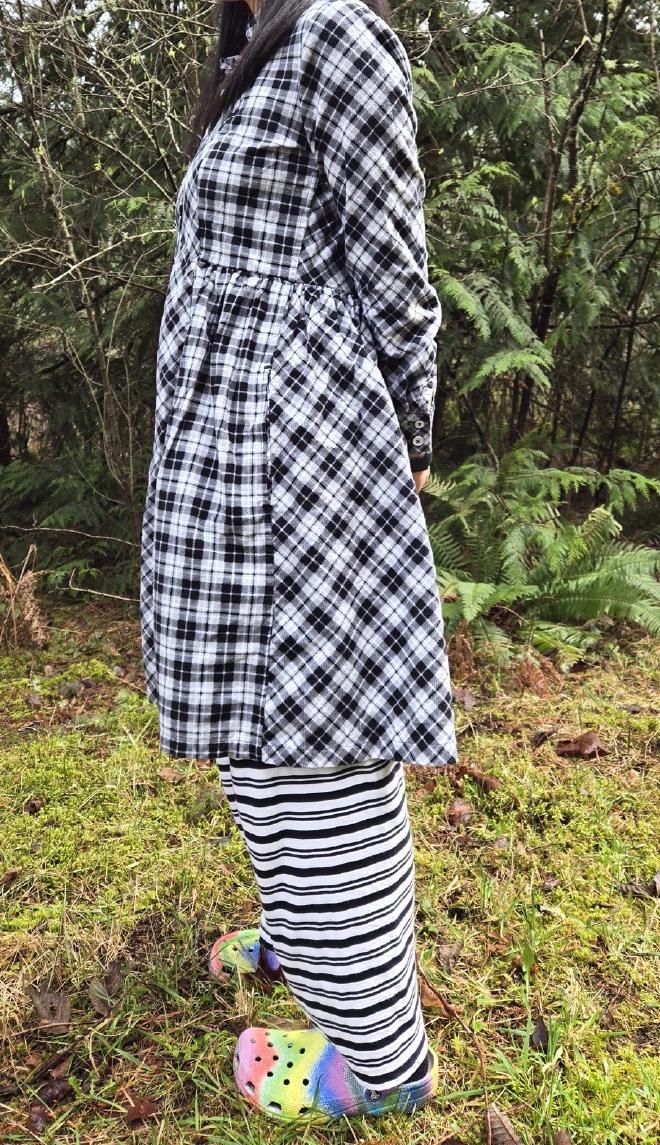
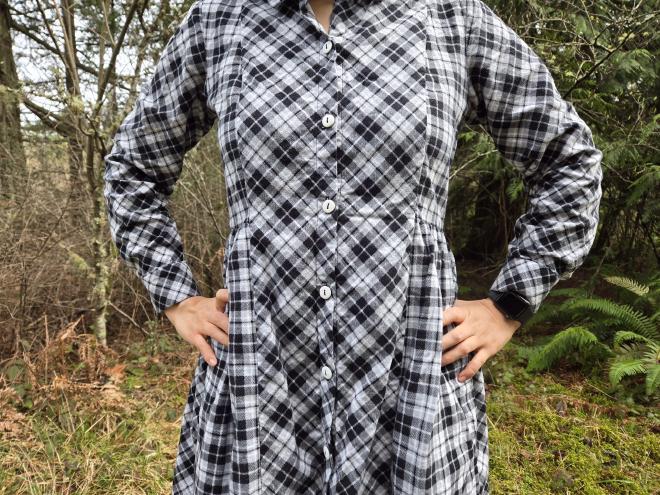
My version of the Saraste Dress looks like this:


Steps Overview #
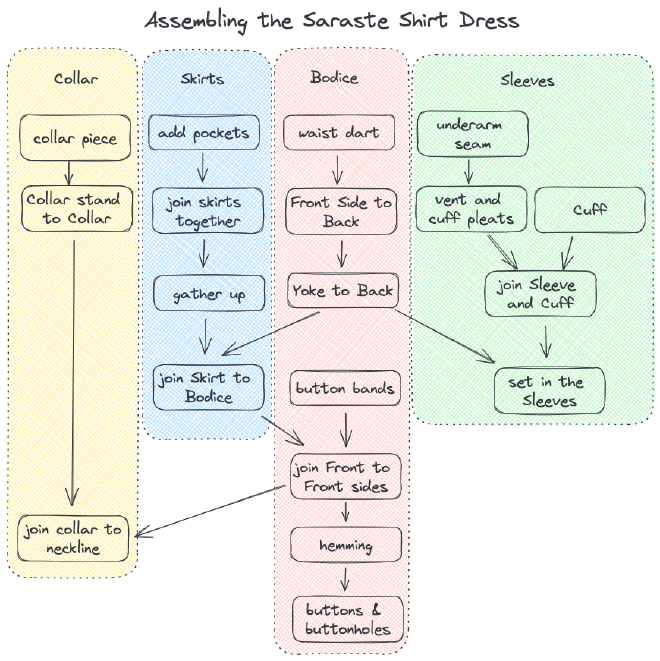
On instagram, the steps/instructions to sew pieces together is a major complaint for most readers – you have to keep flipping back and forth, jumping around the book to be able to know how to sew a certain step. To be fair, I think this issue is the result of:
- The inherit complexity that the projects involve (just look at the Halla Coat!), and
- The authors’ intention to have readers do the projects in the order of easy to hard – readers are expected to acquire each sewing skill along the way. But in reality nobody sews through the book in that order lol.
My approach to alleviate the problem is to draw a dependency graph like this:
The Fabric #
I got some flannel from Joann when it was on sale for $2.99 or something. For this project, I wanted it to have a store-bought look, so I made sure to get a low-profile fabric pattern – and plaids were just a no-brainer for flannel.
Onto the fabric itself. The brushed finish gives a lot of friction when the layers are together, so the fabric don’t slide at all. How awesome is that! – a lot of times there’s no need for pins, yay! However, the fabric doesn’t have a tight weave, so it frays…badly. It was especially annoying when I trimmed the corner, turned right side out, poked into the corner, and found the corner starting to burst out because of the loose weave. Sigh.
Flat-Felling #
One last thing I did during the planning phase was to adjust the seam allowance to make seams flat-fell-able where possible – I don’t have a serger, and I prefer not to leave the edges half-raw like zigzag. For this project, I left the princess seam, armhole, neckline, and cuff as-is, since I’m not ready to take them up for flat-fell yet, but I adjusted the SA to 1.5cm in other places.
Tutorials I checked out for some trickier sections:
- Machine sewing a bar tack by the Fabric Store
- Flat-felled seam with in-seam pockets by the Fabric Store
- Transitioning a flat-felled seam to a split/vent by Handmade by Carolyn
The “Oops” Moments #
- When I realized that I didn’t match up the plaids, right before cutting out my last fabric piece (Front Skirt). This was my first time working with plaids, and the cutting layout was so tight, that matching the fabric plaids really wasn’t top on my mental checklist… Well, it actually turned out ok – the plaids looked very closed to being lined up at the center front.
- When I realized my in-seam pockets were attached onto a bias-cut piece (Front Skirt), after I’ve attached Pocket 1 (out of a total of 2). Again I haven’t cut anything on bias before, and I’ve only heard of horror stories of bias-cut pieces getting saggy without ever experiencing it. If there’s any consolation, I did do a couple of remedies: 1, I used a bar tack at the pocket openings to reinforce; 2, I flat-felled the seam of the grain-cut Back Skirt onto the bias-cut Front Skirt. If I were to do it again, I’d make sure to apply some fusible interfacing generously around the pocket openings on the Front Skirt. We’ll see how the pockets hold up!
Fiddle, Fiddle… #
- Flat felling along a cylinder (like a sleeve) can be really fiddly! My machine (and most other home sewing machines I’ve seen) simply don’t have support for sewing along a cylinder – I can sew across a cylinder with a sewing arm partially off, but I think you’ll need a special machine designed for the “along” direction. Anyways, I had to start from the middle by creating a small window to fit in my pressor foot, then sew towards the cuff, come back in the middle, and sew towards the shoulder.
- Attaching the sleeve to the cuff takes some effort too, since there’s a stitch-in-the-ditch step that, while making sure you’re in the ditch on one side, at the same time catching a bit of a fold on the other side. Even after I hand basted, I didn’t quite catch every bit of the fold on the side I couldn’t see, so I reworked the sections where the catch was a bit off. Thinking back, there isn’t a reward for the stich line being hidden away, so edge stitch instead of stich-in-the-ditch might be easier in this case.
Small and Correctable #
- One of the hem corners at the center front ended up hanging kinda twisted, so I unpicked at couple of inches from both the button band and the hem, then mitered that corner. Both sides were double folded with unequal lengths, but I managed to miter to pretty neatly, thanks to the tutorial from Sie macht. Win!
-
I didn’t match the side seam while connecting the tops to the bottoms at the waist seam, since I was busy navigating through the gathers. Ended up having to unpick a couple of inches around the side seams, re-align the side seams, then stitch them up again.
-
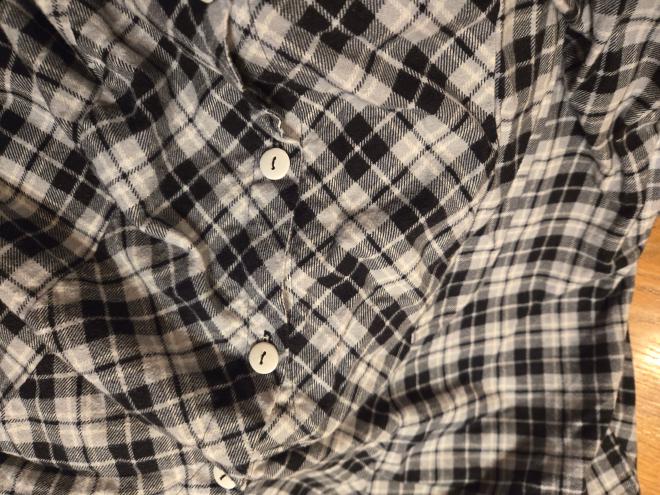
The cuffs were surprisingly and unexpectedly tight for my wrist – I could barely close those buttons if I were to place them according to the pattern. So I ended up unpicking the buttons, and moved them at the very edge of the cuff – looks weird when the cuff was open, I know, but there’s no reason for me to make myself uncomfortable on a piece of garment I made for myself. Now it still doesn’t comfortably accommodate the activity tracker on my wrist, but at least I can reach my hands high up in the air without feeling I’m tied to a chain!
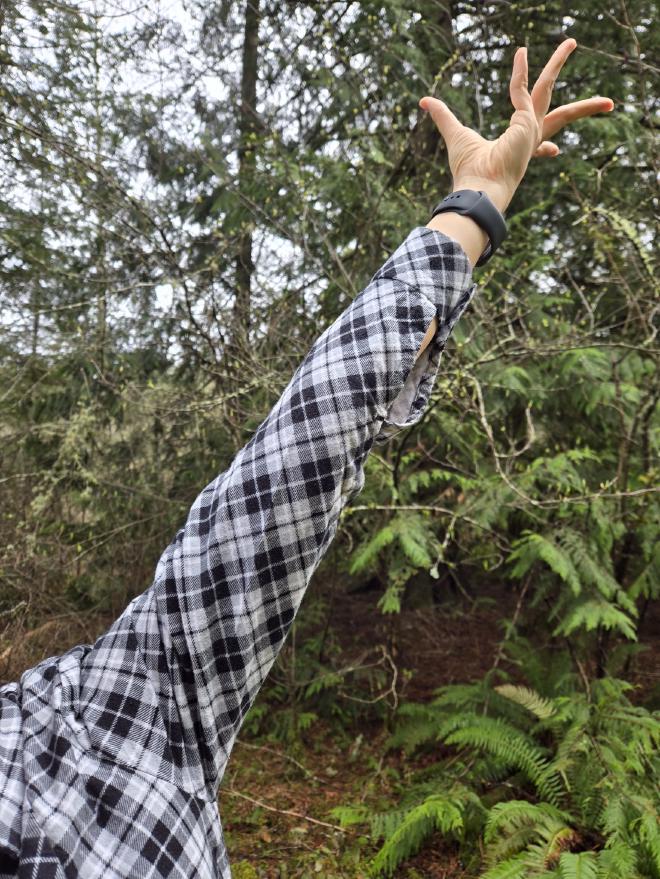
I feel comfortable with the cuff doing this dramatic flourish! 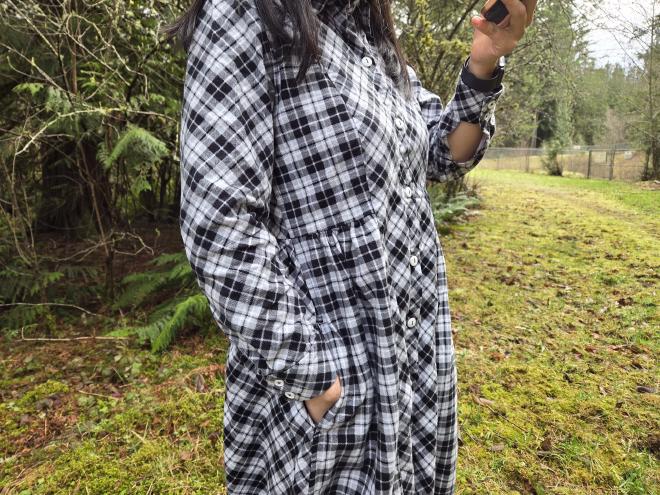
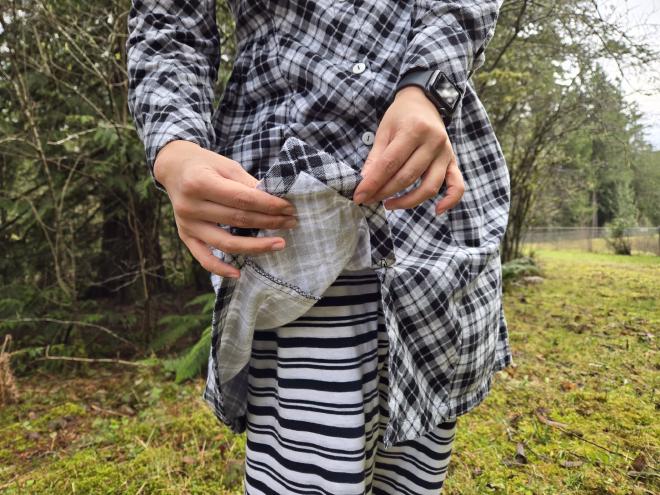
Lovely vent on the sleeve; plus, it has pockets!
Modifications #
I made lots of small modifications to this pattern, because my build is so different from what Named had in mind when they’re drafting this dress. First off, the pattern is drafted for someone 172cm tall, while I’m around 160cm. And second, my upper body and lower body are proportioned like two separate individuals – my bust is Size 4 (across the 9 sizes graded in the book), waist on Size 3.5, but hips sit at around Size 1.25. So here’s what I did to make the pattern fit my figure with the help of Named’s pattern alternation guides and size chart:
This is a long and boring list for my own records, so I folded it.
- [vertical] Shortened the back length by 3cm -- 1.5cm at the waist (Back, Front, Front Side pieces), and 1.5cm somewhere the armhole level (Yoke, Front, Front Side, Sleeve pieces).
- [vertical] Shortened waist-to-hip by 1.3cm at hip level (Front, Front Skirt, Back Skirt).
- [vertical] I wanted a long sleeve winter dress, so I used the sleeves from the Saraste Shirt. And shortened sleeve length by 1.5cm at elbow level.
- [vertical] Shortened the skirts by a whopping 17cm(!) to make it hit right under my knee. This is calculated from my desired length measured from nape of the neck to my bottom of the knee (96cm), subtracted from the actual length of 117.5cm (Size 4), minus the 1.3cm and 3cm I already shortened from the back-length and waist-to-hip
- [horizontal] Because I traced Size 4 and my waist is actually Size 3, I narrowed the waist by 2cm over the circumference -- just tapered in 0.5cm each at waist level from Front Side, and Back pieces.
- [horizontal] My hip was narrower than Size 4 by 9cm, and Size 2 by 1cm -- even with the generous hip ease in this pattern, it was still a lot. So I narrowed 0.5cm each at the Front, and then cut the skirts straight from Size 2.
In addition, I tweaked a few styling stuff too:
- I used the sleeve from the shirt, and shortened the vent by 2cm.
- Also used the collar from the shirt. I like the little ruffles, but I think it suits summer better – maybe on a next project?
- Pockets are gold! I added in-seam pockets from Solina jumpsuits – it comes with a pocket facing which I thought was interesting (but not a must for this dress really). I ended up cutting the bag from the same fabric so the pocket facing went a bit moot, but oh well.
- I cut Front Side and Front Skirt on the bias. I would have liked to cut the Yoke on bias too, but right before doing it I realized my fabric’s plaid pattern wasn’t straight 90 degrees, so if I were to cut it on the bias, the Yoke would ended up being tilted to one side – not good. Side panels are less noticeable so they’re on the bias as planned.
The Fit #
I’m new to fitting, but it’s kinda sad that waist seam rides up at the front. It’s so obvious that I had to turn the hem deeper at the back to make an even hem. Well one thing I know is that my natural waist doesn’t sit on my lowest rib of my rib cage lol.
At first I honestly don’t quite understand the reason behind this. Could possibly be that I left to adjust a piece from the series of adjustments I made. Or because I was hunching badly when I was measuring my bust (my posture isn’t the best, and the angle is awkward). Or Named was drafting for a smaller bust. Then I realize that when I shorten the back length, I’m NOT supposed to be shorten the front length with it. Which makes sense, since the front length has more to do with the bust size, than how long the torso is (at least for me). Sure enough, if I imagine the front un-shortened by 3cm, it would have hit around my natural waist. Lesson learned!
That being said, this dress is still the best-fitting shirt/shirt-dress I have! For some reason my bust has always been pretty tricky – I haven’t had a well-fitting shirt from ready-to-wear, ever since my boobs started to stick out, for as long as I can remember. I guess this dress is a great reminder for me to start making my upper-body sloper already 🙂
I love this dress dearly – twirling in it non-stop!